Address
Huli District, Xiamen Fujian China 361006
Work Hours
Monday to Friday: 7AM - 7PM
Weekend: 10AM - 5PM
Address
Huli District, Xiamen Fujian China 361006
Work Hours
Monday to Friday: 7AM - 7PM
Weekend: 10AM - 5PM
You create a perfect bouquet, but the paper tears or gets wet. This ruins the look and feels unprofessional. But what if you could easily prevent these common problems?
To prevent tearing, choose high-quality, durable paper and handle it with care. To stop it from getting soggy, use waterproof or wax-coated paper. You should also ensure flower stems are properly dried before you wrap them. These simple steps protect your final presentation.
It's a frustrating moment for any florist or gift-giver. You spend time arranging the perfect flowers, only to have the wrap fail you at the last minute. As someone who lives and breathes floral wrapping paper, I've faced these issues many times. Let's dive deeper into why this happens and what you can do about it. I have some practical tips from my own experience that will help you protect your beautiful work.
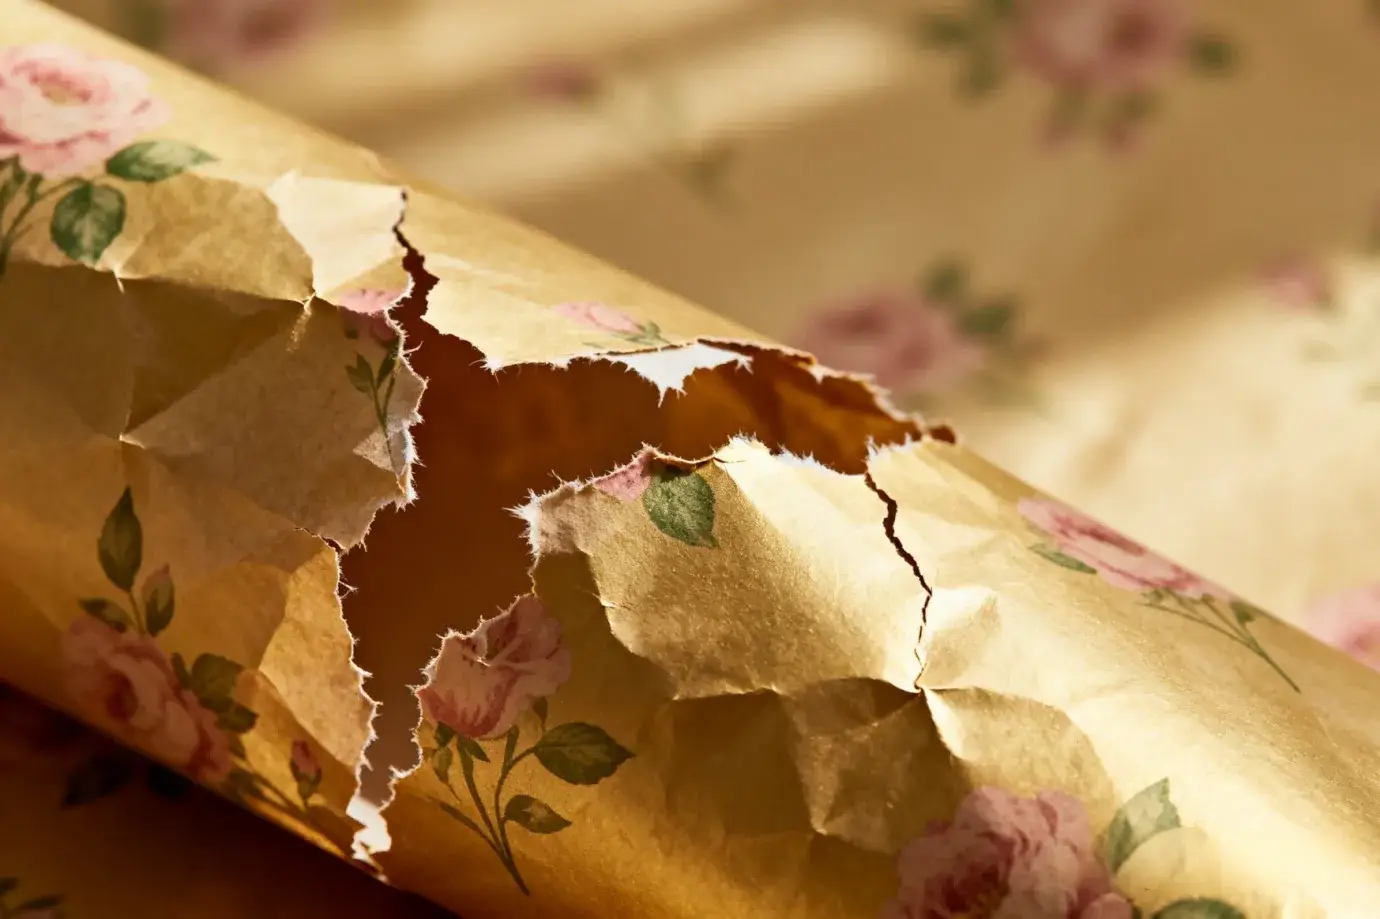
You gently fold the corner, and it rips. It's so frustrating. This simple mistake can ruin your entire presentation. It also wastes material, which costs you time and money.
Paper tears easily because of low-quality material, incorrect handling, or sharp edges on the flowers. Thin, low-GSM paper is the most common reason. Sharp thorns or a rough wrapping technique will also cause rips and ruin your bouquet's look.
Let's break down the reasons why your paper might be giving you trouble. When I first started my business, the floral wrap, I thought all paper was basically the same. I learned very quickly that this is not true. Understanding the "why" behind the tearing is the first step to solving the problem for good.
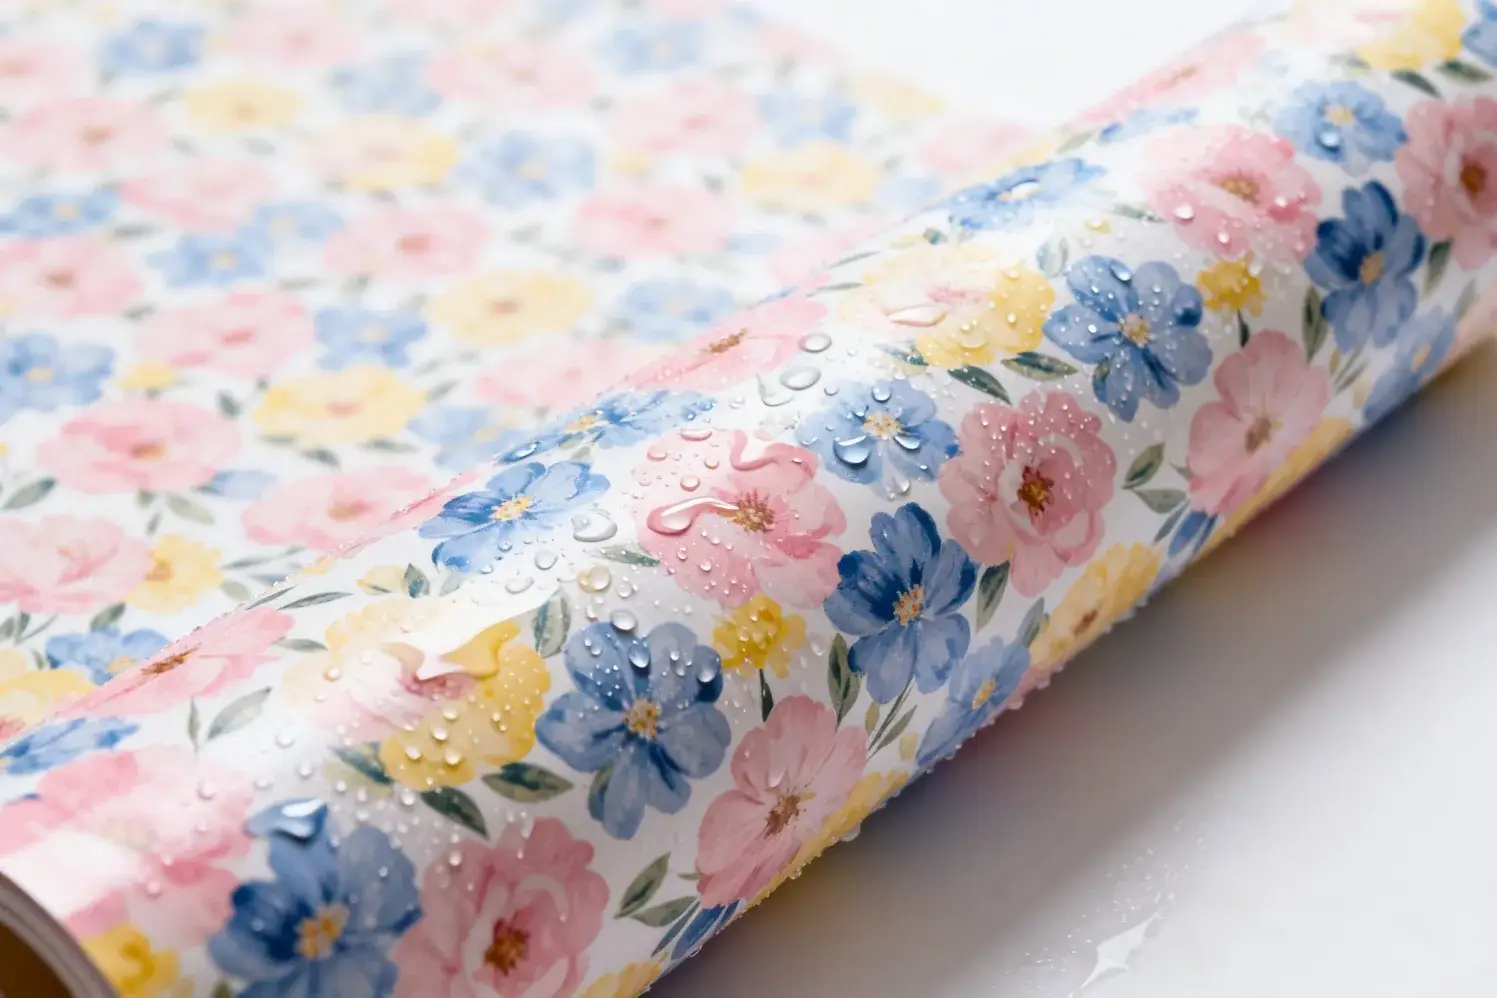
The single biggest factor in tear resistance is the paper's quality and thickness. This is often measured in GSM, or "grams per square meter." A higher GSM number means the paper is thicker, denser, and stronger. A low GSM paper, like basic tissue paper, is very thin and tears with little effort. For wrapping bouquets, especially large ones, you need something more robust.
I learned this the hard way. When I first started, I tried to save a little money by buying cheaper, low-GSM paper. It was a complete disaster. I remember preparing a large order for a local wedding, and I noticed that half the bouquets had small tears by the time they were ready for delivery. It was embarrassing and stressful. That experience taught me that investing in quality paper is not a cost. It's an investment in my brand's reputation and my own peace of mind.
Kraft paper, for example, is much stronger than standard colored paper because it's made with longer wood pulp fibers. These fibers create a more durable sheet that can handle folding and handling.
Even the best paper can tear if you handle it incorrectly. One common mistake is pulling the paper too tight around the bouquet. This creates stress points, especially at the corners, which can easily lead to a tear. The goal is to be firm, but gentle.
Another critical step is preparing the flowers themselves. Before you even think about wrapping, inspect your bouquet for any sharp points. Rose thorns are the most obvious culprit. Always trim them down. Also, check for woody stems or sharp-edged leaves that could snag the paper from the inside. A small snag can quickly turn into a large rip as you continue to handle the bouquet.
Different projects require different types of paper. Understanding their basic properties can save you a lot of trouble. Here is a simple table to help you choose.
| Paper Type | Common GSM/Thickness | Tear Resistance | Best For |
|---|---|---|---|
| Tissue Paper | 10-35 GSM | Low | Filler material, protecting delicate single stems |
| Kraft Paper | 40-80 GSM | High | Large bouquets, achieving a rustic look |
| Cellophane/BOPP | 20-40 Microns | Medium | Waterproofing, creating a modern look |
| Coated Art Paper | 60-100 GSM | Very High | Premium bouquets, waterproof options |
You hand a customer a beautiful bouquet. But then they notice a damp, soggy patch at the bottom. That professional image you worked so hard for is instantly gone.
The best way to waterproof is to use paper that is already waterproof, like cellophane or wax-coated paper. You can also add a protective layer of cellophane inside a non-waterproof paper. And always dry the flower stems thoroughly before you wrap them.
Water damage is just as bad as a tear, maybe even worse. It looks messy and can weaken the paper, leading to rips later on. Luckily, keeping your bouquets dry is very achievable. It comes down to choosing the right materials from the start and using a couple of smart techniques. I've sent out thousands of bouquets from China, and these methods work every time, even for long-distance deliveries.
The easiest solution is to use a wrap that can’t be damaged by water. Today, we have amazing options that are both beautiful and functional.
What if you fall in love with a beautiful paper that isn't waterproof? You can still use it. The secret is the double-wrapping method. I learned this trick from an experienced florist in Guangzhou. She showed me how she could use the most delicate paper by first creating a small, invisible "diaper" of cellophane right around the base of the stems.
Here’s how you do it: Take a small square of clear cellophane. Place the wet ends of the stems in the center and pull the cellophane up around them, securing it with a rubber band or tape. This small, hidden layer contains all the moisture. Then, you can proceed to wrap the entire bouquet with your favorite decorative paper. The outer layer stays perfectly dry and beautiful.
This is a simple but often-overlooked step. After you take your flowers out of their water bucket, don't wrap them immediately. Lay them on a towel and gently pat the stems dry. You want to remove any excess dripping water. This reduces the amount of moisture the paper has to deal with in the first place. For bouquets that need to last a long time, you can also use individual floral water picks on each stem. These small plastic tubes hold water for the stem, completely containing it.
You found the perfect, delicate wrapping paper for your project. But you're almost afraid to touch it. You know that one wrong move will cause a rip or an ugly crease.
Yes, there are special techniques. Always work on a clean, large, flat surface. Make your folds deliberately and avoid pulling the paper too tight. Pre-folding or scoring the paper lightly can also help create clean lines without adding stress to the material.
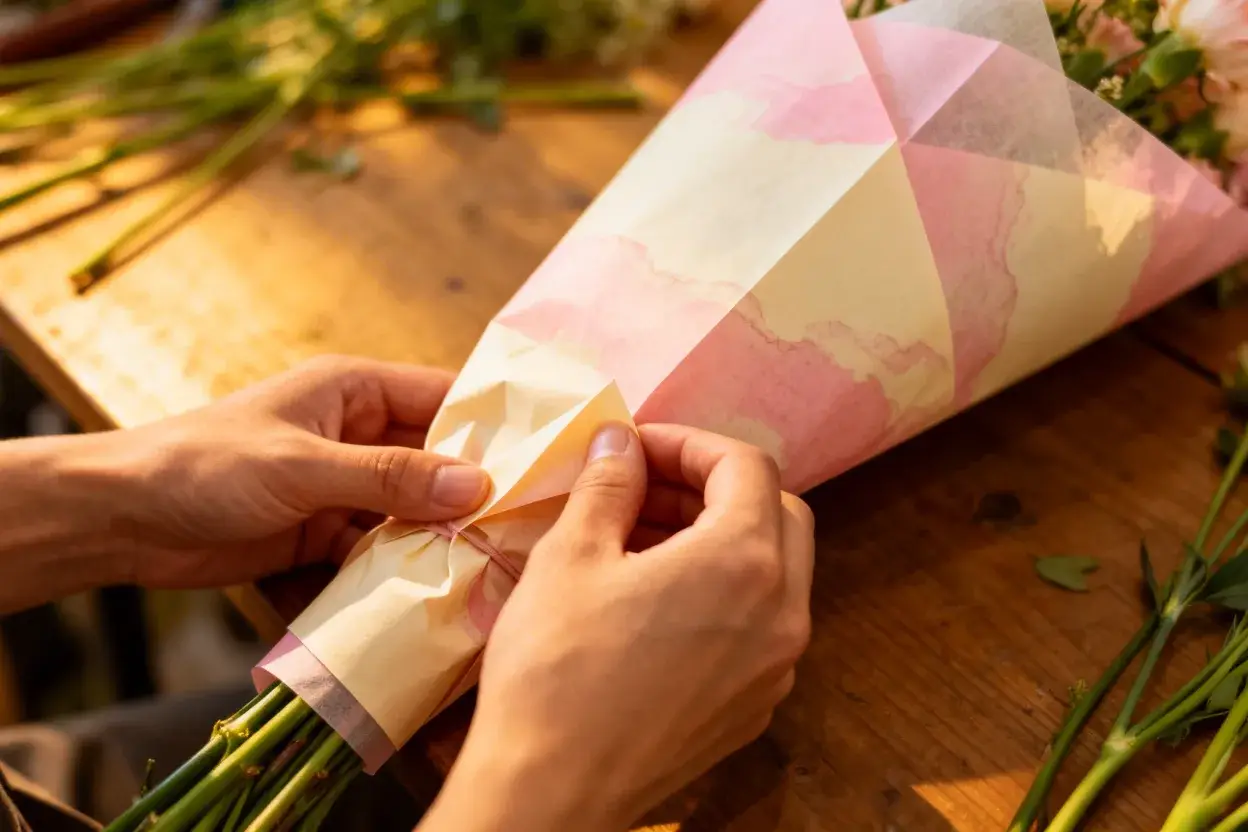
Working with delicate or expensive paper can be nerve-wracking. But it doesn't have to be. With a bit of preparation and the right technique, you can master even the most fragile materials. It’s about being mindful and intentional with your movements. Think of it less like wrapping a gift and more like creating a piece of art.
Your success starts before you even touch the paper. Make sure your wrapping table is completely clean and dry. Any small drop of water or a rough spot on the table can ruin a delicate sheet. I always wipe down my surface before starting a new project.
Lay out all your tools so they are within easy reach. You will want sharp scissors (dull scissors can chew and tear paper), high-quality clear tape, and your ribbon. Having everything ready means you won't have to awkwardly reach for things while holding a half-wrapped bouquet.
The way you fold the paper is everything. Instead of making sharp, fast creases, aim for soft, deliberate folds. Use the flats of your hands and your palms to smooth the paper into place, rather than just using your fingertips. This distributes the pressure more evenly and reduces the risk of tearing.
One professional trick is called "scoring." Before you make a major fold, you can lightly run the back of a scissor blade or a special tool called a bone folder along the line you want to fold. This creates a small indentation that guides the paper, allowing it to fold perfectly without cracking or tearing.
Also, be mindful of the paper's "grain." Just like wood, many papers have a natural grain direction. It will fold more easily and cleanly along the grain. You can often feel it by gently bending the paper in both directions; one way will feel less resistant.
Here is a simple process I follow when I'm working with a challenging paper.
| Step | Action | Why It's Important |
|---|---|---|
| 1. Prepare | Clean your workspace and trim sharp parts of flowers | Prevents accidental snags, tears, and water damage |
| 2. Measure & Cut | Measure and cut the paper to the correct size first | Avoids wrestling with a large, clumsy sheet of paper |
| 3. Position | Place the bouquet on the paper before you start folding | Ensures your placement is perfect from the beginning |
| 4. Fold Gently | Use deliberate motions and the flat of your hand | Prevents accidental rips from pulling too hard or creasing |
| 5. Secure Smartly | Use high-quality double-sided tape for a clean look | Ensures a strong hold without looking messy and adds support |
Protecting your floral paper is simple. Choose the right material, handle it with care, and manage moisture. This ensures your beautiful bouquets always look their absolute best for your customers.