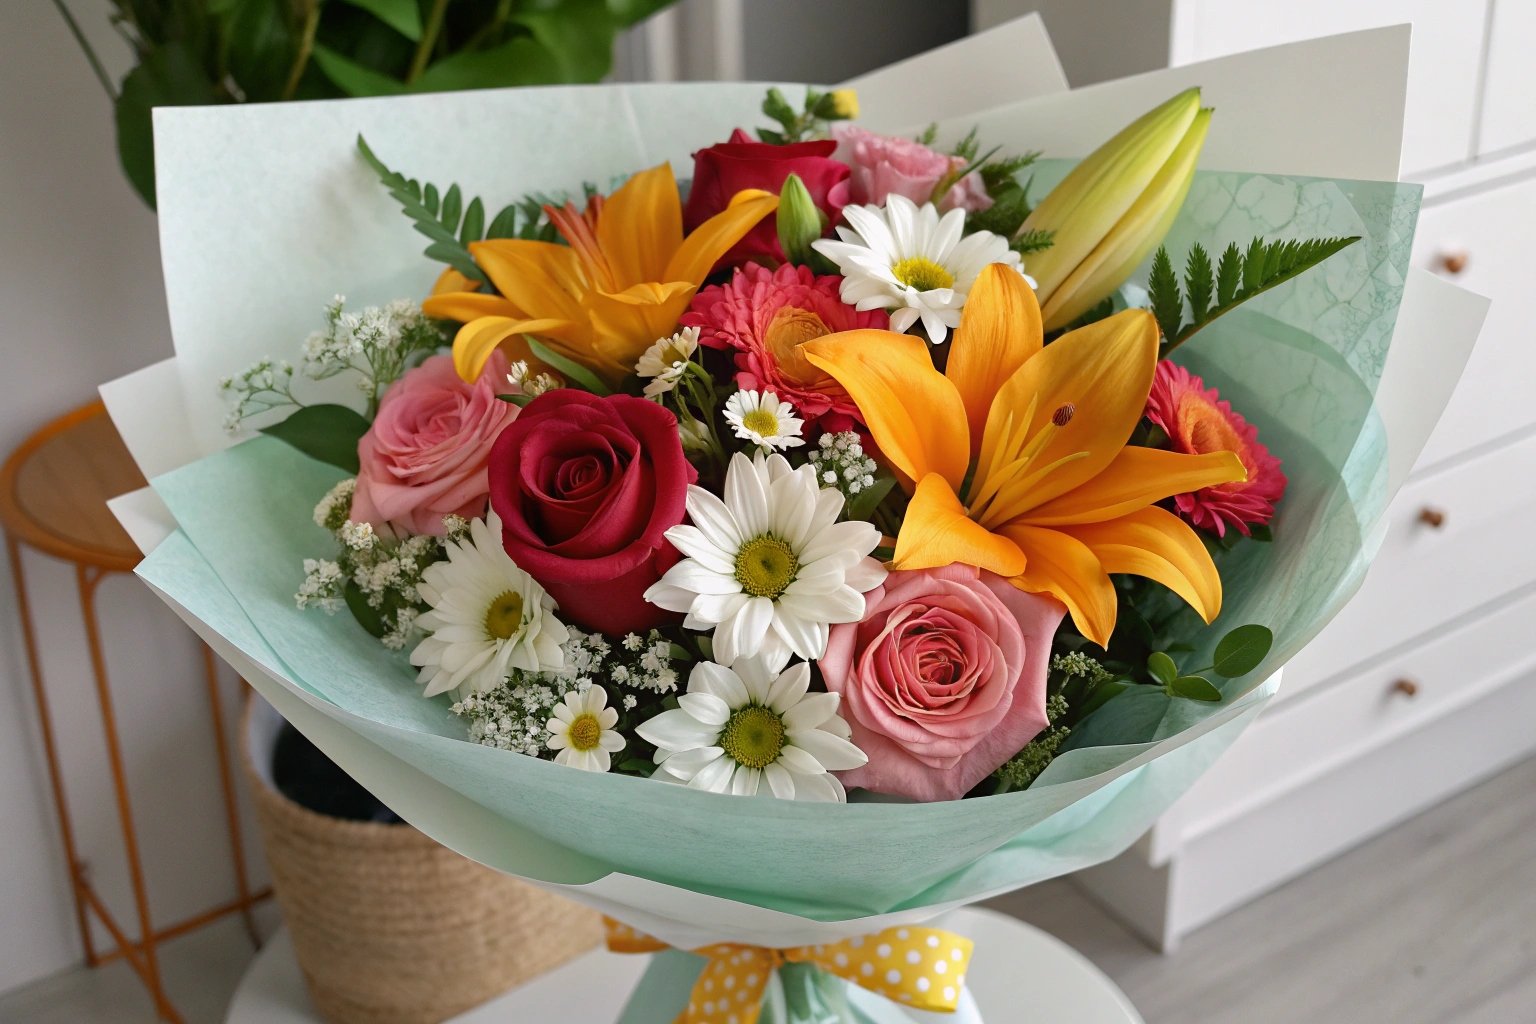
Want to create stunning bouquets but feel intimidated by florists' skills? Think arranging flowers nicely is too complicated or expensive? It's easier than you think with a few simple steps.
To make a beautiful bouquet, first gather fresh flowers, foliage, and tools like snips. Prepare the flowers by removing lower leaves and cutting stems. Then, arrange them using a spiral technique or by building layers, securing the stems, and placing in water.
Creating your own bouquet is incredibly rewarding, letting you personalize arrangements for your home or as gifts. Let's walk through the process together, using tips I've picked up over the years dealing with floral supplies at The Floral Wrap.
What flowers and supplies do I need to start?
Excited to begin but overwhelmed by the choices at the flower market or shop? Worrying about buying the wrong things or forgetting essentials? Let's make a clear list so you feel confident.
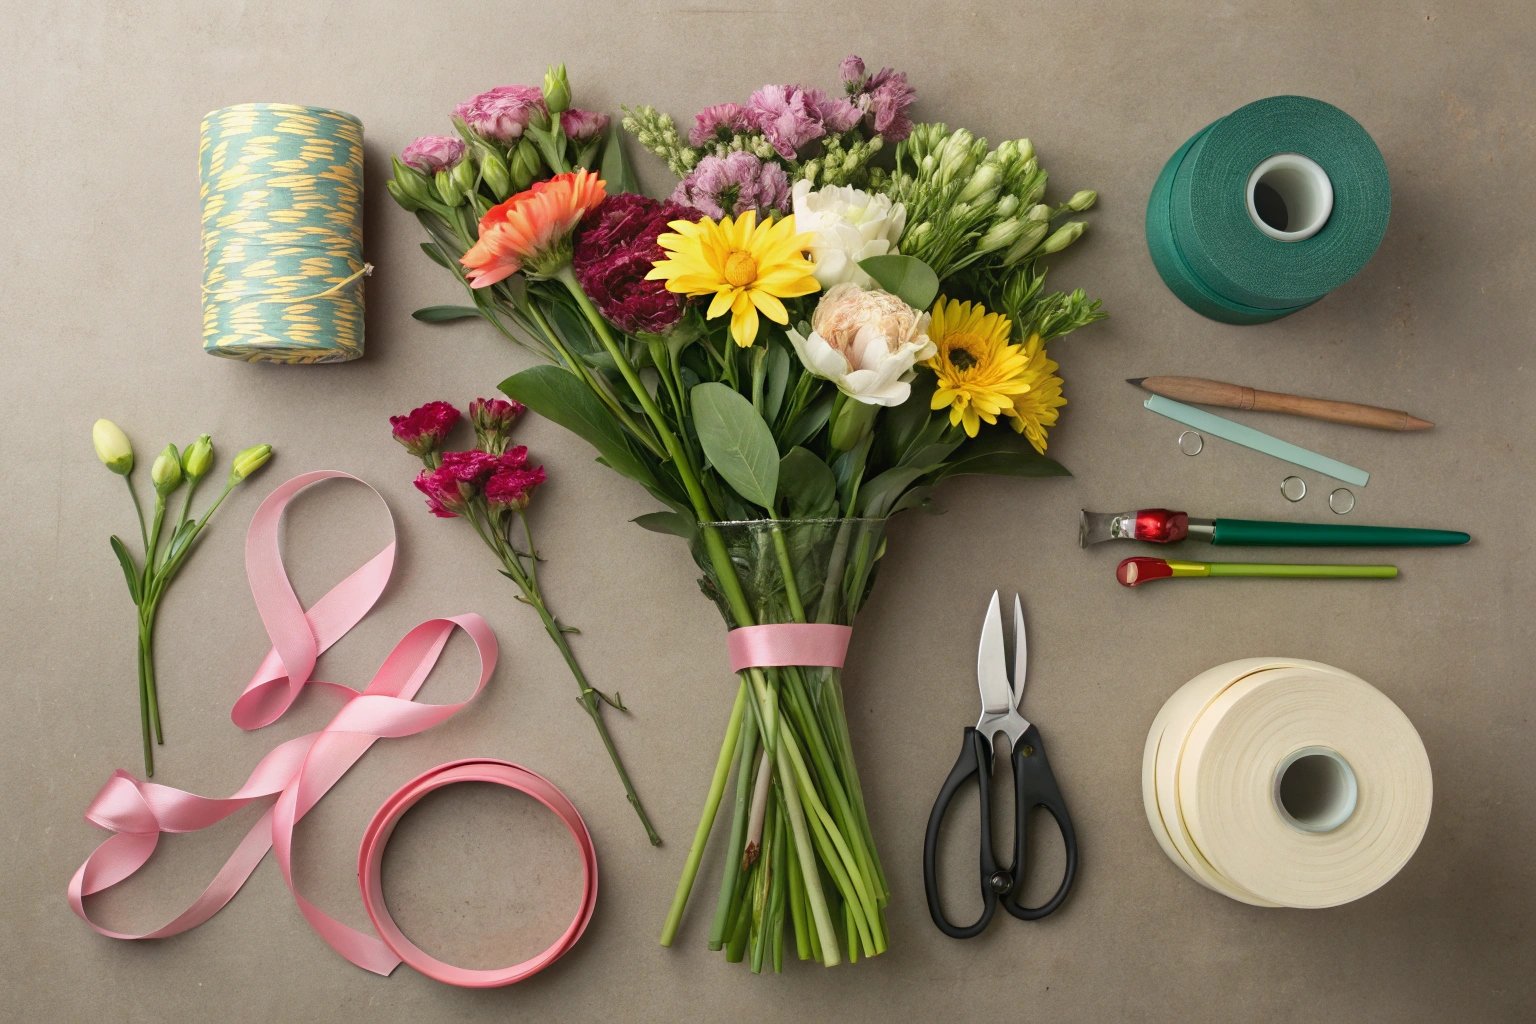
You'll need fresh flowers (focal, filler, foliage types), sharp floral snips or scissors, a clean bucket or vase, water, and maybe flower food. Optional items include ribbon or twine.
Gathering your materials is the first fun step! Choosing the flowers is exciting, like picking colors for a painting. Having the right tools makes the whole process smooth. Let's dive into what works best.
Choosing Your Flowers: The Stars of the Show
Think about the 'ingredients' of your bouquet. A good mix usually includes three main types:
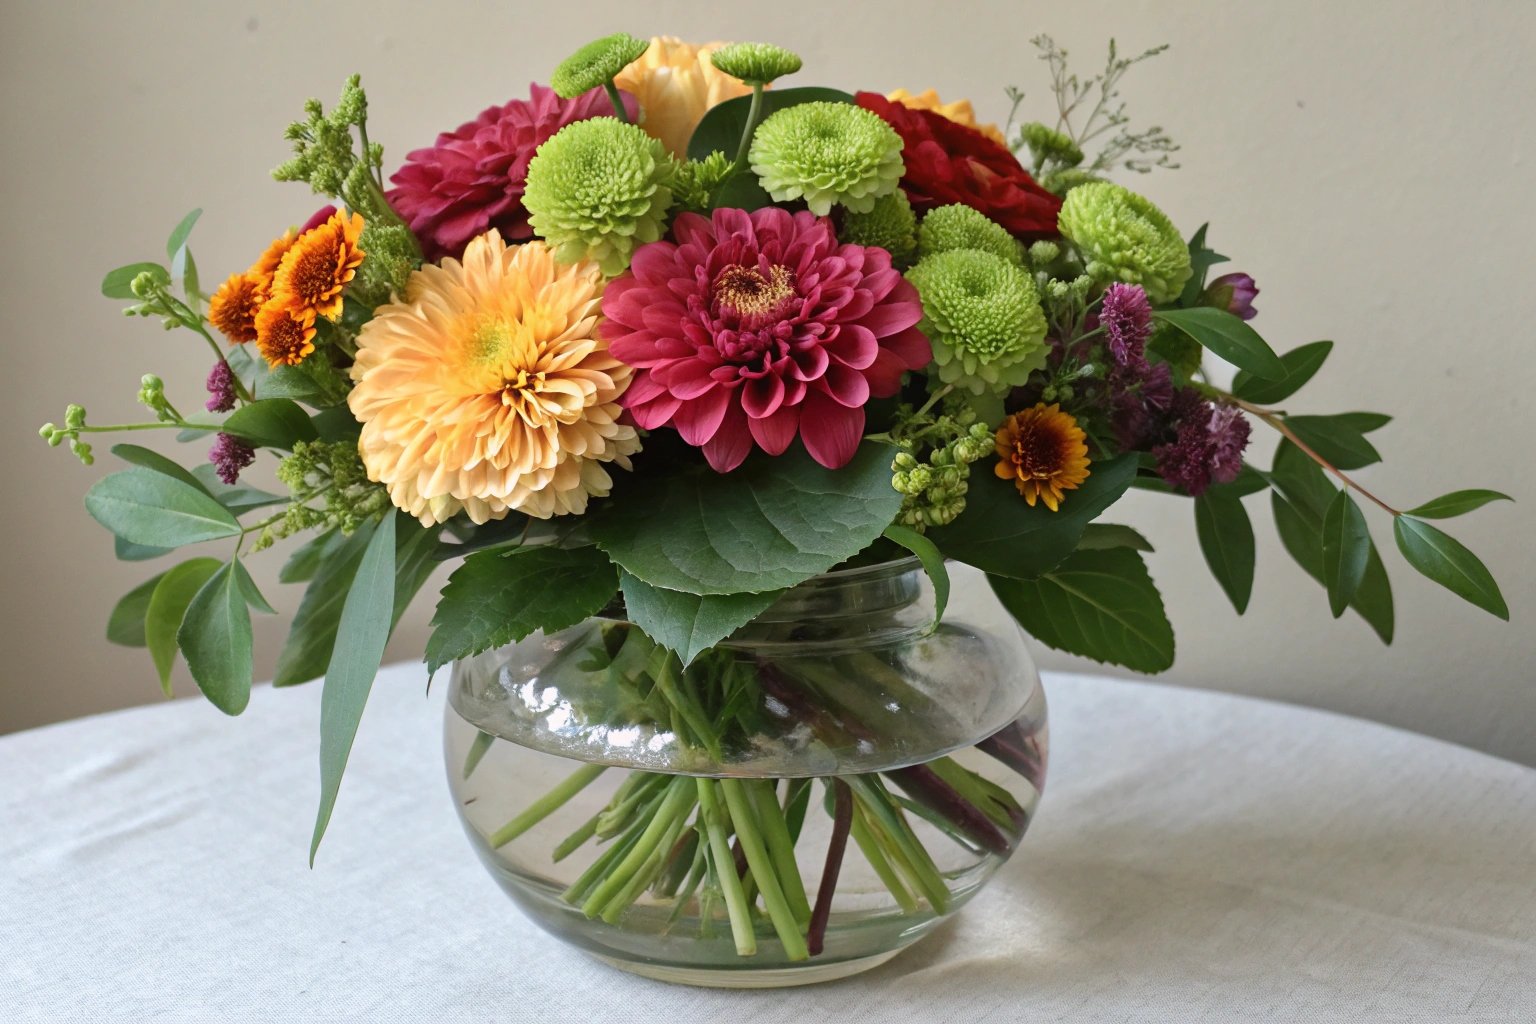
Focal Flowers: These are your main stars, the eye-catching blooms. Think roses, lilies, sunflowers, peonies, or dahlias. Choose 1-3 types for a cohesive look. Pick flowers that are mostly open but with some buds for longer life.
Filler Flowers: These smaller flowers fill gaps, add texture, and support the focal blooms. Examples include baby's breath (gypsophila), statice, spray roses, carnations, or waxflower. They add volume and softness.
Foliage (Greens): Leaves and branches create the structure and background for your flowers. Eucalyptus, ferns, pittosporum, or even interesting leaves from your garden work well. Foliage adds shape and makes the colors pop.
Think about a color scheme. Do you want something monochromatic (all shades of one color), complementary (opposite colors on the color wheel, like yellow and purple), or analogous (colors next to each other, like pink, red, and orange)?
Essential Tools and Supplies
You don't need a professional florist kit, but a few items are key:
Floral Snips or Sharp Scissors: Clean cuts are vital for water uptake. Regular scissors can crush stems. Invest in decent snips if you plan to do this often. Keep them clean!
Clean Bucket: For conditioning flowers initially. Needs to be thoroughly washed to prevent bacteria.
Clean Vase: For the final arrangement. Again, cleanliness is crucial for flower life.
Water: Flowers need lots of it! Use lukewarm water initially for conditioning, as flowers absorb it more easily.
Flower Food: Those little packets really work! They provide sugar for energy and an acidifier/biocide to keep water clean and help stems absorb water. If you don't have a packet, some suggest a drop of bleach and a pinch of sugar, but commercial food is balanced.
Optional, But Helpful Additions
Twine or Floral Tape: To tie off a hand-tied bouquet securely before placing it in a vase or wrapping it.
Ribbon: For a decorative finish on the stems.
Waterproof Floral Tape: Can be used to create a grid on the top of a wide-mouthed vase to help stems stay in place.
Gloves: To protect your hands from thorns (especially with roses) or sap.
Here’s a quick checklist:
Item
Purpose
Essential?
Notes
Focal Flowers
Main visual interest
Yes
Roses, Lilies, Sunflowers, etc.
Filler Flowers
Fill gaps, add texture
Yes
Baby's Breath, Statice, Spray Roses, etc.
Foliage (Greens)
Structure, background, contrast
Yes
Eucalyptus, Ferns, Pittosporum, etc.
Floral Snips
Clean stem cuts
Yes
Sharp scissors are a second-best option
Clean Bucket
Conditioning flowers
Yes
Must be very clean
Clean Vase
Final arrangement
Yes
Choose size appropriate for flowers
Water
Hydration
Yes
Lukewarm for conditioning, cool for vase
Flower Food
Extend life, keep water clean
Highly Rec
Follow packet instructions
Twine/Floral Tape
Secure stems (hand-tied)
Optional
If making a hand-tied bunch
Ribbon
Decoration
Optional
Covers twine/tape
Waterproof Tape
Create vase grid
Optional
Useful for wide vases
Gloves
Protect hands
Optional
Especially useful for roses
Having these ready makes arranging much more relaxing and fun!
How should I prepare the flowers before arranging?
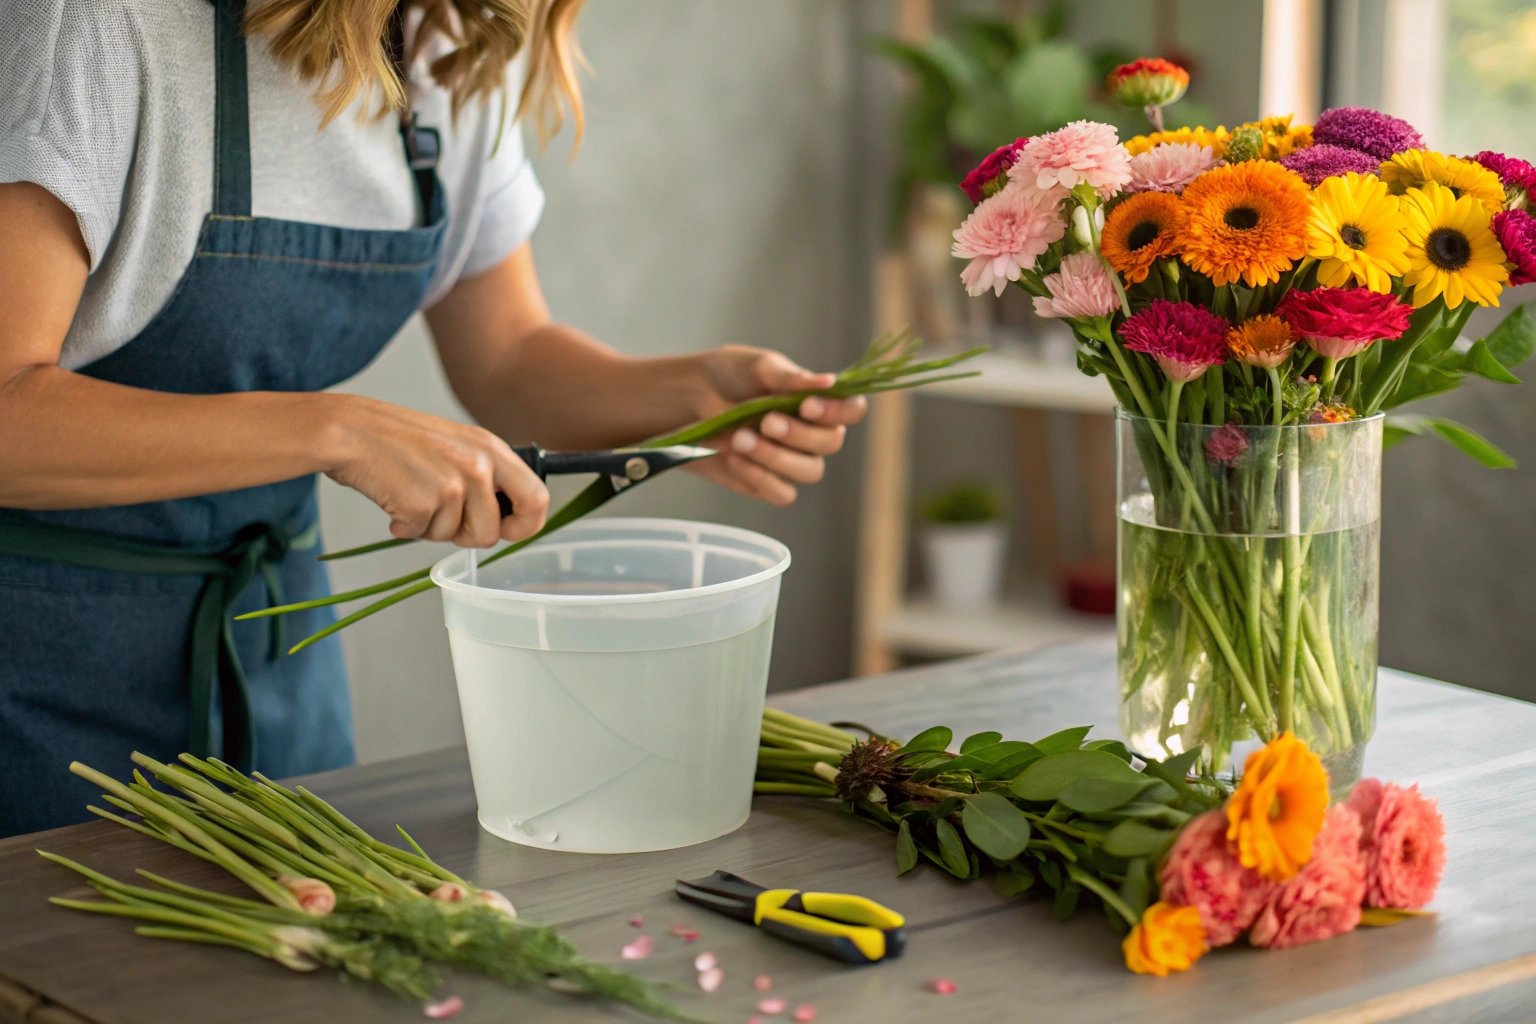
Brought your beautiful flowers home but they look a bit sad or wilt quickly? Skipping preparation can drastically shorten your bouquet's life. Let's get them ready properly.
Condition your flowers first. Remove all leaves below the waterline. Under water, cut stems at a sharp angle. Place them immediately in a clean bucket with water and flower food for several hours.
This conditioning step is super important. It allows the flowers to fully hydrate after their journey and before you start handling them for arranging. Think of it like letting them have a long drink and rest. Skipping this often leads to disappointment later. I learned this the hard way early on!
Why Conditioning Matters
Flowers get stressed during transport. They lose water and might have air bubbles in their stems blocking water uptake. Conditioning helps:
Rehydrate: Replenishes the water lost.
Clear Stems: Cutting underwater prevents new air bubbles from forming at the cut end, allowing water to flow freely up the stem.
Nourish: Flower food provides energy and keeps bacteria low.
Acclimatize: Lets flowers adjust to your home environment.
Step-by-Step Flower Preparation
Unpack Carefully: Remove flowers from their packaging as soon as you get home. Don't overcrowd them.
Prepare Your Bucket: Fill a clean bucket about one-third full with lukewarm water (around 100-110°F or 37-43°C). Mix in the flower food according to the packet instructions.
Strip Lower Foliage: Remove any leaves, thorns, or small side shoots that will fall below the waterline in your final vase. Leaves sitting in water rot quickly, creating bacteria that clog stems and make the water smelly. This is a crucial step.
Cut Stems Underwater: Fill a sink or another basin with water. Submerge the bottom inch or two of a stem underwater. Using sharp snips, cut about 1 inch off the stem at a sharp (45-degree) angle. Cutting at an angle creates more surface area for water absorption and prevents the stem from sitting flat on the vase bottom. Cutting underwater prevents air from being immediately sucked into the freshly cut stem.
Place in Bucket Immediately: As soon as you cut a stem, place it directly into your prepared bucket of water and flower food. Don't let the cut end dry out.
Repeat for All Stems: Do this for every flower and piece of foliage.
Hydrate: Leave the bucket of flowers in a cool, dark place (away from direct sun or heat) for at least 2-4 hours, or even overnight if possible. This allows them to drink fully.
Remove Guard Petals (Optional): Some flowers, like roses, have outer "guard petals" that look a bit rough or discolored. These protected the bud as it grew. You can gently remove these 2-3 outer petals by pinching them at the base and pulling them off if you prefer a cleaner look.
Common Prep Mistakes to Avoid
Using Dull Tools: Crushes stems instead of making a clean cut.
Leaving Leaves Below Waterline: The fastest way to dirty water and kill flowers.
Cutting Stems in Air: Allows air bubbles to block water uptake.
Skipping Hydration Time: Flowers won't last as long.
Using Dirty Buckets/Vases: Introduces bacteria.
Taking the time for proper preparation makes a world of difference in how beautiful your bouquet looks and how long it lasts.
What's the best way to arrange the flowers?
Flowers prepped and ready? Facing the pile and unsure how to combine them artfully? Don't worry, arranging doesn't require magic, just a simple technique.
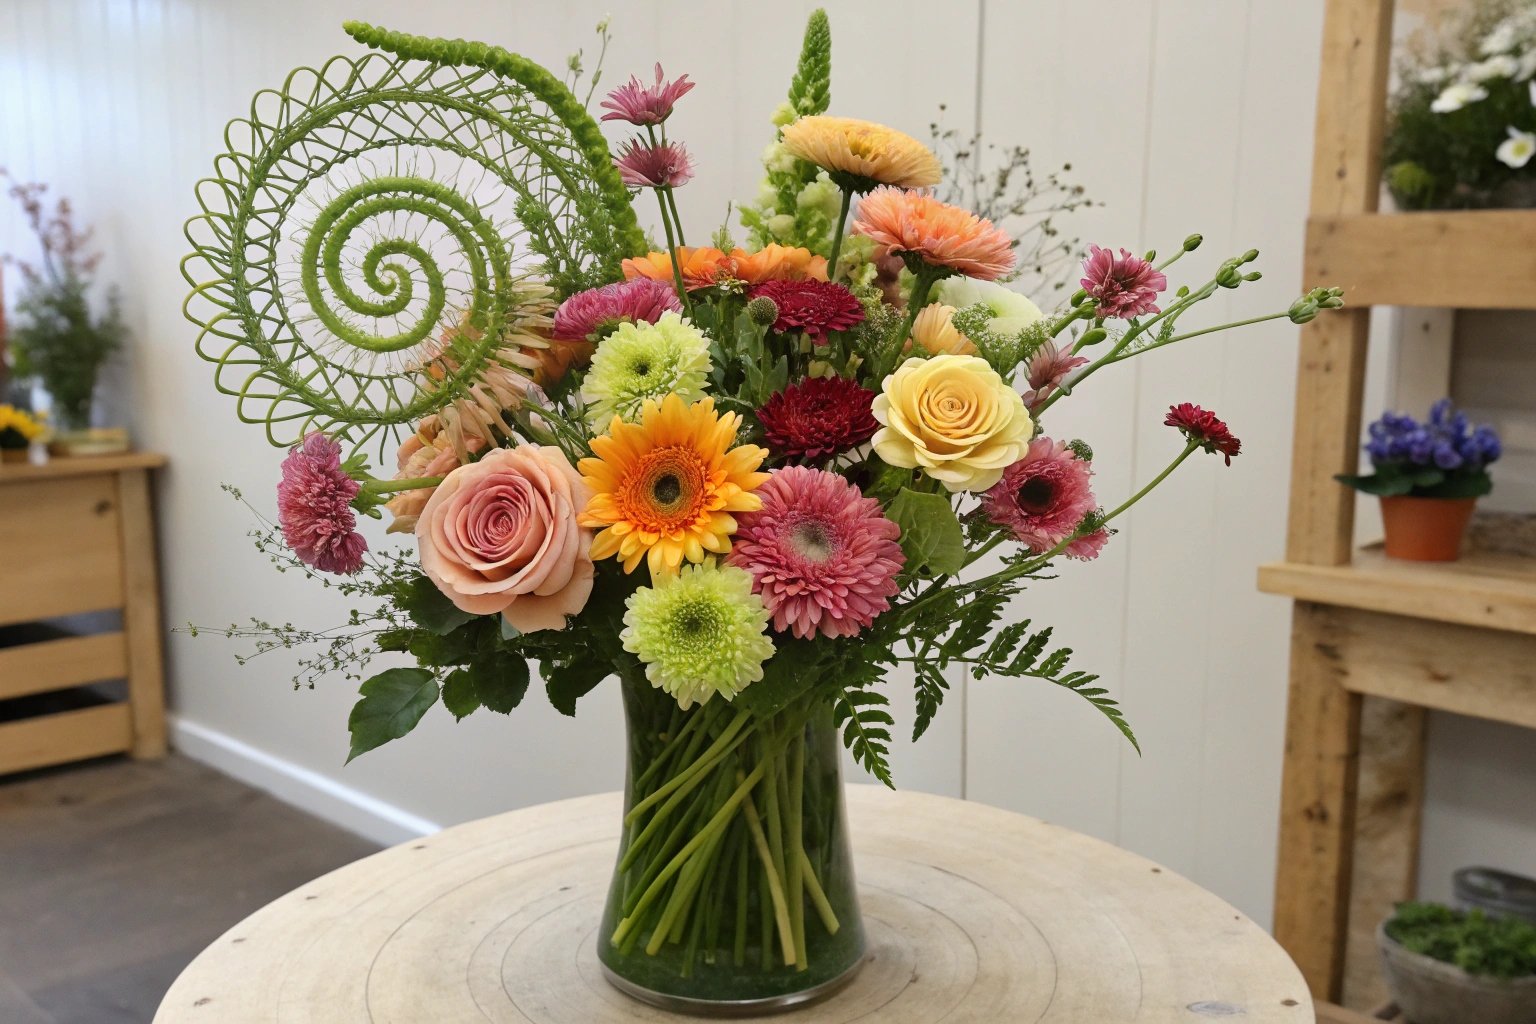
Start by creating a base structure with foliage. Then, add focal flowers one by one, turning the bouquet as you go. Use the spiral technique for hand-tied or build outwards in a vase. Fill gaps with filler flowers last.
There are a few popular methods, but the key is building structure and thinking about balance. The spiral technique is great for hand-tied bouquets, while building in a vase can feel easier for beginners. Let's explore both. I personally enjoy the spiral method for the control it gives.
The Spiral Technique (for Hand-Tied Bouquets)
This method creates a classic, rounded bouquet where stems spiral elegantly, making it stable and easy to place in a vase.
Start with Foliage: Hold 2-3 stems of foliage in your non-dominant hand. This forms the initial structure.
Add First Focal Flower: Place your first main flower across the foliage stems at a slight angle (around 30-45 degrees).
Add Next Stem: Take another flower or foliage stem. Place it across the first flower stem, also at an angle, aiming in the same direction (e.g., all stems leaning left to right from top to bottom where you hold them).
Turn and Repeat: Give the developing bouquet a quarter turn in your hand. Add the next stem across the previous ones, maintaining the same angle.
Continue Turning and Adding: Keep adding stems (mixing focal, filler, and foliage) one by one, placing each new stem at an angle across the previous one and turning the bouquet slightly after each addition. All stems should spiral in the same direction below your hand.
Build Outwards: As you add more stems, build outwards to create a rounded shape. Check the arrangement from the top and sides as you go. Distribute colors and textures evenly.
Adjust Heights: Gently pull or push stems slightly to vary heights for a more natural look.
Secure: Once happy, tie the bouquet firmly at the binding point (where your hand is holding it) with twine or floral tape.
Building in a Vase (Easier for Beginners?)
If holding and spiraling feels tricky, arranging directly in the vase is a great alternative.
Prepare the Vase: Ensure the vase is clean. Fill it about two-thirds full with fresh, cool water and flower food.
Create a Grid (Optional): For wide-mouthed vases, create a grid over the opening using clear waterproof floral tape. This provides structure and holds stems in place. Make intersecting vertical and horizontal lines.
Start with Foliage: Place stems of foliage around the rim of the vase, angling them outwards slightly. Add a few more pieces crisscrossing through the center to create a base structure (or use the tape grid openings).
Add Focal Flowers: Insert your main flowers, cutting stems to the desired height. Distribute them evenly, turning the vase as you work. Place some lower, some slightly higher.
Add Filler Flowers: Fill in the gaps between the focal flowers and foliage with your filler flowers. Aim for a balanced look from all angles.
Check and Adjust: Step back and look at the arrangement. Adjust stem heights, fill any noticeable holes, and ensure good color distribution. Make sure all stems reach the water.
General Arrangement Tips
Balance: Distribute large blooms and bright colors so the bouquet doesn't feel heavier on one side.
Height Variation: Avoid having all flowers at the exact same height. Create gentle peaks and valleys.
Focal Point: Often, having a slightly more prominent area or flower draws the eye in.
Turn, Turn, Turn: Whether hand-tying or arranging in a vase, constantly turn the arrangement to ensure it looks good from all sides.
Don't Overcrowd: Give flowers some space to breathe and open fully.
Practice makes perfect! Your first few attempts might not look exactly like a professional's, but they will be uniquely yours.
How do I finish and care for the bouquet to make it last?
Your bouquet is arranged beautifully! Want to ensure it stays looking fresh as long as possible and has that final polish? Just putting it down isn't the end. Let's cover the finishing touches and care.
If hand-tied, secure stems tightly with twine or tape. Cut all stems to the same length. Place immediately in a clean vase with fresh water and flower food. Keep cool, away from direct sun and ripening fruit.
The final steps are crucial for presentation and longevity. Securing the stems properly, choosing the right spot, and providing ongoing care can add days to the life of your beautiful creation. We take presentation seriously at The Floral Wrap, and these final touches matter.
Finishing Your Bouquet
Securing Hand-Tied Bouquets: If you used the spiral method, make sure your binding point (where you held the stems) is tied very securely with twine or waterproof floral tape. Wrap it several times tightly. This keeps the structure intact. You can then cover this with a decorative ribbon if desired.
Trimming Stems: Once tied (or if arranged in a vase), ensure all stems reach the water. For a hand-tied bouquet going into a vase, hold it next to the vase to gauge the right height. Cut all stems cleanly (again, ideally at an angle) to the same length so they sit well in the vase.
Vase Preparation: Use a spotlessly clean vase. Any bacteria will shorten flower life. Fill it with fresh, cool water mixed with the correct amount of flower food.
Placement for Longevity
Where you put your bouquet significantly impacts how long it lasts.
Keep it Cool: Flowers prefer cooler temperatures. Avoid placing them in direct sunlight, near radiators, heaters, fireplaces, or on top of TVs or appliances that generate heat.
Avoid Drafts: Keep bouquets away from strong drafts from open windows, fans, or air conditioning vents, as this can dehydrate them quickly.
Away from Fruit: Ripening fruit releases ethylene gas, which causes flowers (especially certain types like carnations and lilies) to age and wilt much faster. Keep your fruit bowl and flower vase separate!
Ongoing Care
Your job isn't quite done once the bouquet is in the vase!
Check Water Daily: Flowers drink a lot, especially in the first day or two. Top up the water level daily with fresh water (preferably with flower food mixed in).
Change Water Regularly: Every 2-3 days, completely change the water. Remove the bouquet, clean the vase thoroughly, refill with fresh cool water and flower food, re-trim about half an inch off the stems at an angle, and place the bouquet back in. This removes bacteria and ensures stems can keep drinking.
Remove Wilted Blooms: As individual flowers or leaves start to fade or wilt, carefully remove them. Decaying plant matter encourages mold and bacteria and can release ethylene gas.
Wrapping for Gifting (Optional)
If you're giving the bouquet as a gift, consider a simple wrap after securing the stems.
Simple Kraft Paper Wrap: Lay the bouquet on a square of kraft paper and fold the sides up, tying with ribbon or twine (as detailed in the tissue paper flower article). This gives a lovely, natural look. At The Floral Wrap, we love how paper enhances presentation.
Water Source: For transport, you can wrap the stem ends in wet paper towels covered in plastic wrap, or use special florist water vials on each stem if needed for a longer time out of water.
These final steps ensure your beautiful work is enjoyed for as long as possible!
Conclusion
Creating a beautiful flower bouquet is within your reach! By gathering the right flowers and supplies, prepping them properly, using a simple arranging technique, and providing good aftercare, you can make stunning arrangements. Enjoy the process!